The Significance of Burnishing in Venetian Plaster
Burnishing is a crucial step in the Venetian plaster application process that significantly enhances the final appearance and durability of the finish. This technique involves polishing the plaster surface to create a smooth, high-gloss finish that reflects light beautifully and adds depth to the plaster’s natural texture. Burnishing not only improves the aesthetic appeal of Venetian plaster but also helps to seal the surface, making it more resistant to moisture and wear.
How Burnishing Enhances the Final Appearance and Durability
Burnishing brings out the natural beauty of Venetian plaster by creating a polished, mirror-like finish that highlights the plaster’s depth and richness. The process compresses the plaster particles, increasing the surface’s density and making it more durable and resistant to damage. Proper burnishing techniques ensure that the plaster finish is not only visually stunning but also long-lasting, capable of withstanding the test of time. In a city like Sydney, where interior design standards are high, achieving a flawless burnished finish can elevate the elegance and sophistication of any space.
Timing and Tools
Importance of Proper Timing
Ideal Time to Start Burnishing
The timing of burnishing is critical for achieving the desired high-gloss finish in Venetian plaster. The ideal time to start burnishing is when the plaster has set but is still slightly damp. This stage allows the surface to be worked without disrupting the underlying layers.
- Check the Surface: Gently touch the plaster. It should feel firm but still cool to the touch, indicating that there is still some moisture present.
- Visual Cues: The plaster should have lost its initial wet sheen but not be fully dry.
Signs That the Plaster is Ready for Burnishing
- Surface Firmness: The plaster should be firm enough to withstand the pressure of burnishing without being overly soft or malleable.
- Tactile Feel: When touching the surface, it should feel slightly cool, signifying residual moisture.
Consequences of Burnishing Too Early or Too Late
- Too Early: Burnishing too early, while the plaster is still too wet, can cause streaking and pull the material, leading to an uneven finish. It can also damage the underlying layers.
- Too Late: If burnishing is started too late, after the plaster has fully dried, it becomes difficult to achieve the desired level of gloss. The surface may resist polishing and appear dull or uneven.
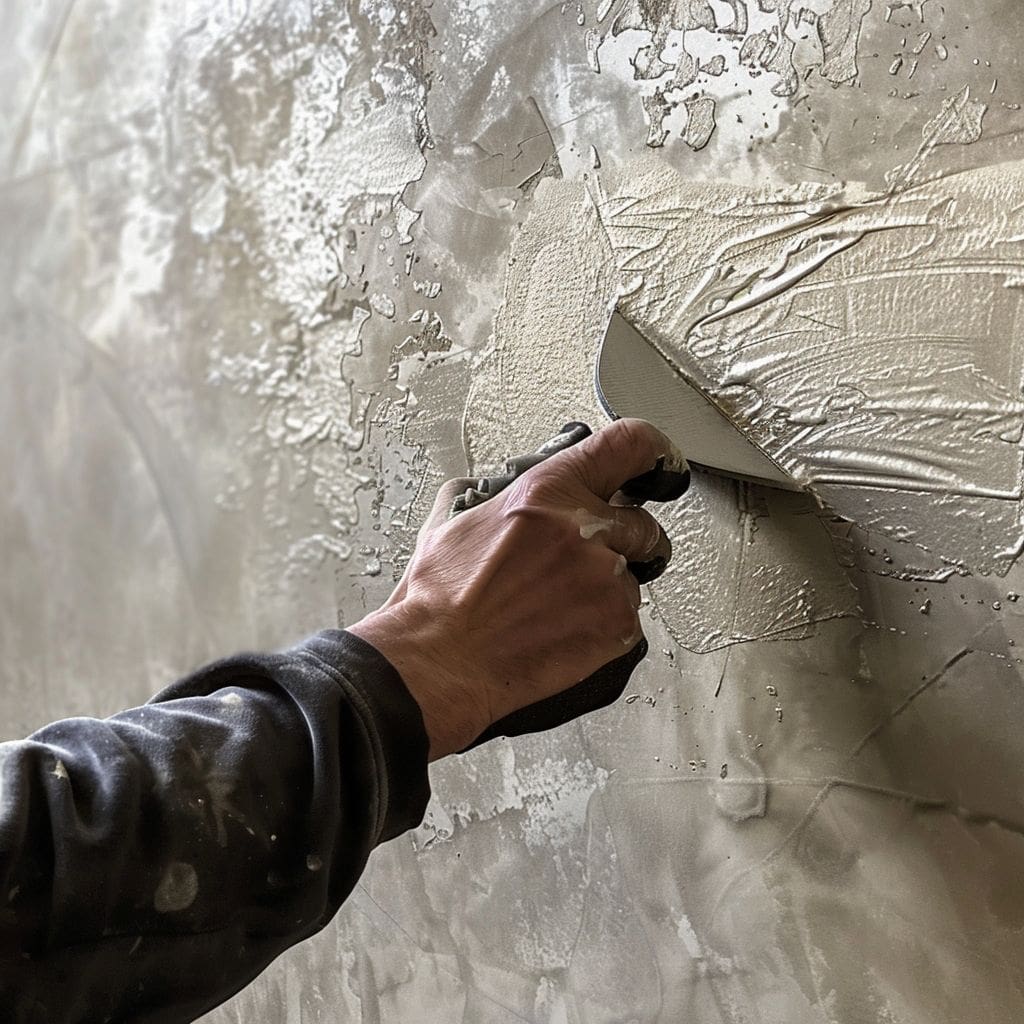
Essential Tools for Burnishing
Stainless Steel Trowel
- Initial and Final Burnishing: A stainless steel trowel is the primary tool for both initial and final burnishing. Its smooth, flat surface helps in evenly compressing and polishing the plaster.
- Application: Use the trowel to apply consistent, light pressure in overlapping circular motions.
Polishing Trowel
- Achieving a High-Gloss Finish: A polishing trowel, often with a slightly curved edge, is ideal for achieving a high-gloss finish. It allows for greater control and precision during the final stages of burnishing.
- Application: Use firmer pressure to enhance the gloss, working in sections for uniform results.
Burnishing Stone
- Traditional Tool: A burnishing stone, typically made of agate or a similar material, is used in traditional Venetian plaster techniques to achieve a polished look.
- Application: Gently rub the stone over the plaster surface in circular motions, applying light to moderate pressure.
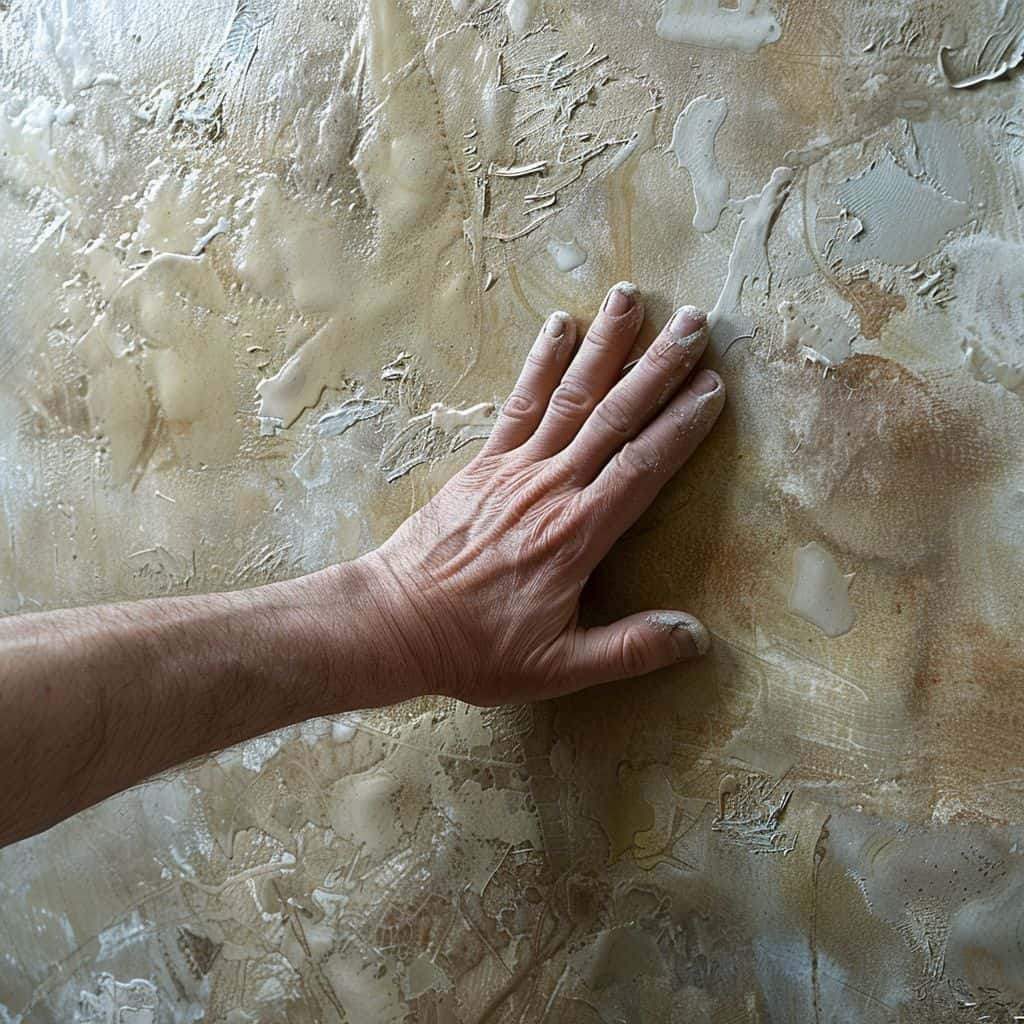
Soft Cloth or Sponge
- Final Touches: A soft cloth or sponge is used for the final touches to enhance the shine without scratching the surface.
- Application: Buff the surface gently, ensuring an even polish.
Achieving a High Gloss Finish
Step-by-Step Guide to Burnishing
Initial Burnishing
- Begin When the Plaster is Still Damp: Start burnishing as soon as the plaster is firm but still slightly damp. This is when the surface is most receptive to polishing.
- Use a Clean Stainless Steel Trowel: Ensure the trowel is clean and free from any dried plaster to avoid scratching the surface.
- Apply Light Pressure: Using the trowel, apply light, consistent pressure in overlapping circular motions. This initial burnishing helps to compress the plaster and start bringing out the shine.
- Work in Sections: Divide the wall into manageable sections to maintain control and ensure uniformity across the entire surface.
Final Burnishing
- After the Plaster is Fully Dry: Wait until the plaster has dried completely, which typically takes 48-72 hours depending on environmental conditions.
- Use a Polishing Trowel or Burnishing Stone: For the final burnishing, use a polishing trowel or burnishing stone to achieve a high-gloss finish.
- Apply Firmer Pressure: Apply firmer, consistent pressure to enhance the gloss further. Continue to use overlapping circular motions, working methodically across the surface.
- Buff the Surface: Once the desired level of gloss is achieved, use a soft cloth or sponge to buff the surface gently. This final polish removes any minor imperfections and adds extra shine.
Tips for Optimal Results
- Maintain Consistent Pressure: Consistent pressure is key to achieving an even, high-gloss finish. Avoid pressing too hard in some areas and too lightly in others.
- Keep Tools Clean: Regularly clean the trowel and other burnishing tools to prevent dried plaster from scratching the surface.
- Work in Sections: Working in small sections helps to maintain control and ensures that each part of the surface receives adequate attention.
Common Issues and Solutions
- Streaks: Streaks can occur if the plaster is burnished too early or with uneven pressure. To fix this, wait until the plaster is properly set and ensure consistent, light pressure during burnishing.
- Scratches: Scratches are often caused by dirty tools. Always use clean tools and, if scratches occur, gently reapply a thin layer of plaster and smooth it out.
- Dull Finish: A dull finish may result from insufficient burnishing. Ensure that you apply adequate pressure and use a polishing trowel for the final burnishing to achieve a high-gloss finish.
Alternatives to Traditional Burnishing
Using Wax for Extra Shine
Types of Wax Suitable for Venetian Plaster
- Natural Beeswax: Offers a natural, subtle shine and enhances the plaster’s protective qualities.
- Carnauba Wax: Provides a higher gloss finish and is more durable than beeswax. It is often preferred for high-traffic areas.
- Synthetic Waxes: Formulated specifically for Venetian plaster, these can offer various levels of shine and additional protection.
Application Techniques for Wax
- Clean the Surface: Ensure the plaster surface is clean and dry before applying wax.
- Apply a Thin Layer of Wax: Use a soft cloth or sponge to apply a thin, even layer of wax. Work in small sections, applying the wax in circular motions.
- Let the Wax Sit: Allow the wax to sit for a few minutes to bond with the plaster.
- Buff the Wax: Use a clean, soft cloth to buff the wax in circular motions until a glossy finish is achieved. This step enhances the shine and smoothness of the surface.
Polishing Compounds and Sealers
Benefits of Using Polishing Compounds
- Enhanced Shine: Polishing compounds can provide a higher level of gloss compared to traditional burnishing.
- Durability: They add an extra layer of protection, making the surface more resistant to scratches and wear.
- Ease of Application: Polishing compounds are easy to apply and can be used to quickly enhance the finish of the plaster.
How to Apply and Buff Polishing Compounds
- Choose the Right Compound: Select a polishing compound specifically designed for Venetian plaster.
- Apply the Compound: Use a clean cloth or sponge to apply the compound in thin, even layers.
- Buff the Surface: Once the compound is applied, use a soft cloth or a mechanical buffer to polish the surface in circular motions. Continue buffing until the desired level of shine is achieved.
Types of Sealers that Enhance Gloss and Protect the Plaster
- Acrylic Sealers: Provide a clear, glossy finish and add a protective layer that enhances the durability of the plaster.
- Silicone-Based Sealers: Offer water resistance and a shiny finish, making them ideal for areas prone to moisture.
- Polyurethane Sealers: Known for their durability and high-gloss finish, they provide excellent protection against wear and tear.
Application Techniques for Sealers
- Prepare the Surface: Ensure the plaster is clean and dry before applying the sealer.
- Apply the Sealer: Use a brush or roller to apply a thin, even coat of sealer. Work in small sections to ensure uniform coverage.
- Allow to Dry: Let the sealer dry according to the manufacturer’s instructions, typically for 24-48 hours.
- Apply Additional Coats if Needed: For extra protection and shine, apply additional coats, allowing each layer to dry fully before applying the next.
By exploring these alternatives, you can achieve a high-gloss finish and enhance the durability of your Venetian plaster, providing additional protection and aesthetic appeal.
Conclusion
Recap of Key Burnishing Techniques and Tools
Burnishing is an essential step in achieving the characteristic high-gloss finish of Venetian plaster. Proper timing, the right tools, and careful technique are all critical to success. Starting the burnishing process while the plaster is still slightly damp and finishing it after the plaster has fully dried ensures a smooth, polished surface. Utilising tools such as stainless steel trowels, polishing trowels, burnishing stones, and soft cloths allows for a professional finish. Alternatives like wax, polishing compounds, and sealers provide additional methods to enhance the shine and durability of the plaster.
Summary of Tips for Achieving a High-Gloss Finish
- Proper Timing: Begin burnishing when the plaster is set but still damp and finish after it is fully dry.
- Essential Tools: Use clean, high-quality tools such as stainless steel trowels and burnishing stones.
- Consistent Pressure: Maintain consistent pressure and use overlapping circular motions.
- Clean Tools: Regularly clean your tools to avoid scratching the surface.
- Work in Sections: Divide the wall into manageable sections for uniform results.
Final Thoughts on the Importance of Burnishing in Venetian Plaster Applications
Burnishing not only enhances the aesthetic appeal of Venetian plaster but also contributes to its durability and longevity. A well-burnished surface is more resistant to moisture and wear, ensuring that the plaster retains its beauty over time. In a dynamic city like Sydney, where interior design demands high standards, mastering the art of burnishing can significantly elevate the quality of your Venetian plaster projects.
Burnishing Services by Venetian Plasterer in Sydney
At Venetian Plasterer, we specialise in achieving the perfect high-gloss finish for Venetian plaster through expert burnishing techniques. Our Sydney based Venetian plasterers are skilled artisans and will handle each step of the process with precision and care. Whether using traditional tools or exploring modern alternatives like wax and polishing compounds, we ensure that every project meets the highest standards of quality and beauty. Trust Venetian Plasterer for all your Venetian plaster needs in Sydney and experience the unparalleled elegance of a professionally burnished finish.
Related